A campervan seat swivel is designed to open up your van living space and will undoubtedly be a valuable addition to your campervan conversion.
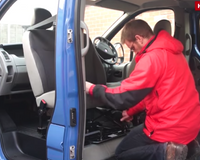
In today’s spotlight, we want to show you how easy it is for you to install a RIB RHD VW T5/T6 single driver's seat swivel in 4 simple steps.
We’ve also got a really useful ‘How to’ installation video for you to watch where Mike shows you exactly how to do this task and gives you hints and tips along the way. It’s definitely worth watching.
There are differences between a RIB driver and RIB passenger seat swivel plate, and between offset and non-offset, so it’s worth noting here that this guide is purely for the single driver's seat.
Step 1 - Removing the seat
Raise your seat up if you can as it’s going to make it easier for you for access and also to unplug any connections you have under the seat base, for example, airbag wires, heated seats etc. Then you’ll need a 13 mm socket spanner to undo the two nuts at the front which hold the slider to the seat base and the two bolts at the rear.
Then simply lift the seat straight off.
Once you remove the seat you will see that there are two vertical threaded bolts fixed in place at the front of the seat base as shown in the image. At the back of the base you will have removed the two bolts; the nuts are not visible as they are welded in place inside the base. Keep any original factory nuts and bolts that you remove as you’ll need to use these in a later step.

Threaded bolt fixed in place
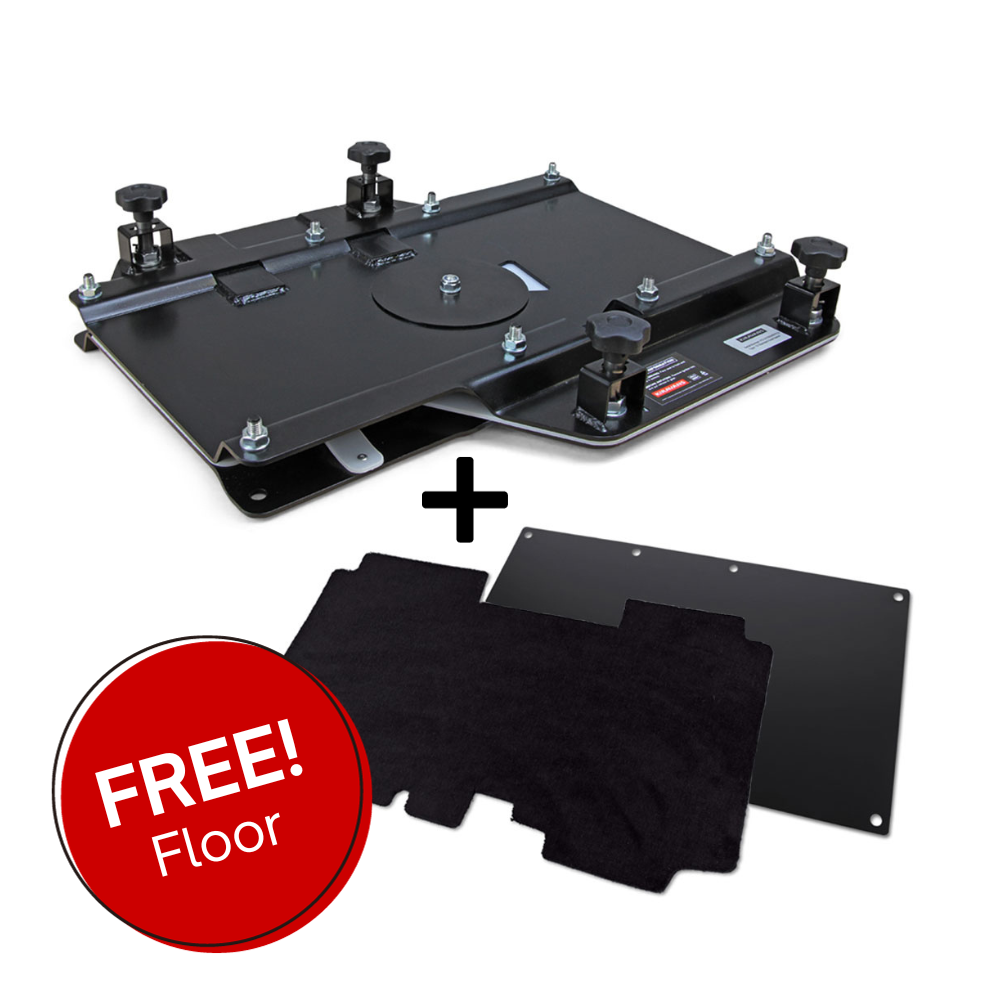
Step 2 - Placing the RIB swivel plate
You can now position the swivel plate onto the drivers seat base as shown below.
The red lever should be pointing upwards on the left, next to the handbrake.

Swivel seat plate positioned onto seat base
Step 3 - Bolt front of swivel plate to seat base
Secure the plate to the two front fixed bolts on your seat base by raising up the plate slightly, insert the two original black factory front nuts into the gap and tighten them down.

Swivel plate bolted to seat base
Next thing to do is take the two long countersunk bolts. Push the red lever away from you and rotate the top plate to allow access into the two back holes. You should find the two small captive nuts in the seat base. You may have to move your shim over slightly to get clearance, then pop in the bolts and secure them in place.


Countersunk bolts will secure the swivel plate to the seat base
Now that all four corner bolts are fixed in place you will need to tighten them using an allen key and flat spanner.
If you’re installing the swivel plate permanently then we strongly recommend adding a dab of loctite glue to each bolt as you tighten it. Otherwise, the bolts tend to loosen over time and you may start noticing some squeaks.
So, there you have it...you have now got the bottom of the swivel plate secured onto your seat base.
You will now be able to rotate the swivel plate freely in an anti-clockwise direction.
The top plate will slide over the top of your handbrake once it is released. It is designed to only just clear the handbrake plastic trim. If it does touch on the way round you may need to press down on the trim to avoid scratching it.
Don't forget to put any wires under your seat back through the hole in the swivel plate before you put your seat back.
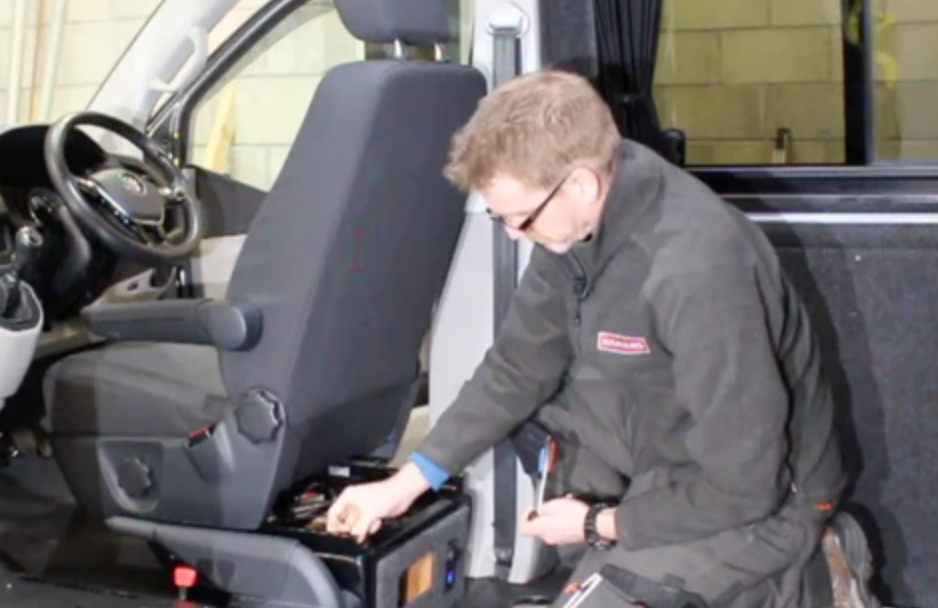
Step 4: Securing the seat to the swivel plate
Next job is to lift the seat onto the top base and secure it in place.
Non-offset swivel bases use the four shorter countersunk bolts.
The offset swivel base uses 2 countersunk bolts at the front and the original VW bolts removed from the base in step 1 at the rear.
Lift the seat into position placing the bolts through the front mounting holes in your sliders. All bolts need to go up from the bottom and then the nyloc nuts go on top, starting at the front and then slide your seat forward so you can bolt up the seat rails to the base at the back.


And that’s it! Your seat should be securely installed onto your swivel seat base :)

Side view of handbrake and seat lever
Video: How to Fit a RIB Driver Seat Swivel into a VW T5/T6 Van
Now that you’ve successfully fitted your RIB drivers seat swivel base, we also thought it might be helpful to include a few operating tips that we recommend so that you can get the best out of your seat.
- Don’t throw your seat around in one forceful motion. Please treat it gently or the sudden stop when you reach the forward locking position can shear off the release latch.
- Your seat has plastic trim all around which will force you to pump up the seat to rotate it. You will also need to slide the seat forwards and back on its rails in order to get it past the steering wheel and door posts on its way round.
- To avoid scratching your handbrake plastic trim don't sit on the seat while you rotate it and press down on the handbrake plastic if necessary to keep it clear of the rotating swivel plate.
- Your seat will feel less firmly attached than it did originally and you will be able to rock it a little but it should not rattle if you have all the bolts in the right places and with the correct orientation.
- If you tend to sit with the seat pumped down low you will probably need to cut off some of the seat trim plastic to allow the lever to move freely.
- Occasionally we find that the original VW bolts incorporate captive washers - these make the bolts sit higher than normal. Ultimately, this can lead to the bolts 'knocking' together as you rotate the seat. If this is the case with your seat you will need to replace 2 of the original VW bolts with dome headed 25mm M8 bolts. These are lower profile and will not cause an obstruction when you rotate the seat.
So there you have it folks. We hope you find this installation spotlight helpful, but of course if you have any questions then please don’t hesitate to contact the Kiravans support team who will be able to assist you.
Check out Kiravans for our full range of quality campervan conversion products and helpful installation video guides, so you can start building your dream adventure today.